How to Upload a File to Firebase
Some apps permit users to upload images and files, read them, delete them and even download them whenever users want. Such functionality can exist useful for social media platforms, blogging platforms or storage services. Firebase Cloud Storage offers a solution to shop user-generated content easily.
Hello fellow devs, in this commodity, we'll be discussing Firebase Cloud Storage and how we tin implement it to upload, retrieve and store user files securely.
What is Firebase Cloud Storage?
Firebase Deject Storage is a service that developers can employ to store and download files generated directly by clients. No server-side code is needed.
It uses Google Cloud Storage buckets to shop the files, allowing accessibility from both Google Deject and Firebase. These buckets are formed inside a hierarchical construction. For example:

What I really like about Firebase Deject Storage is how seamless information technology integrates with Firebase Authentication so you can organize uploaded files based on each user and apply access controls if needed.
Also, it scales automatically and so there'due south no worry about moving to some other provider when stored data gets also large.
Now that nosotros know what Firebase Storage can practise, let's try using it in our project. For this tutorial, I'm making a simple photo album app that allows users to upload, view and delete images.
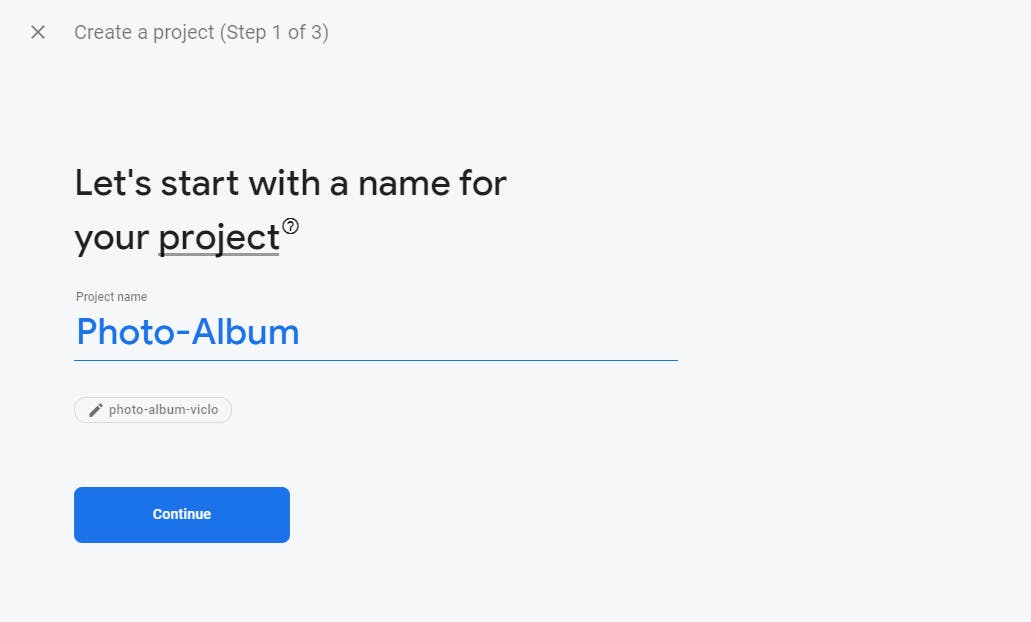
Pace one: Create a new Firebase Project
Caput over to firebase.google.com and create a new project.
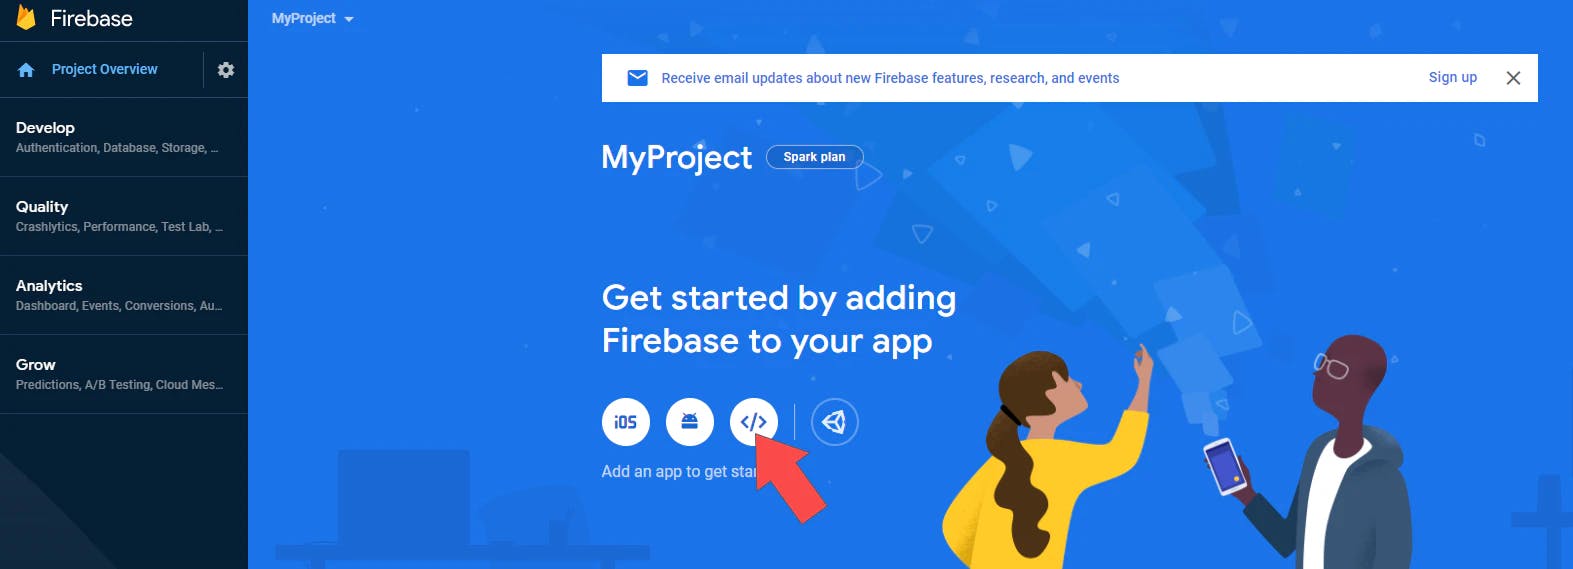
On the dashboard, click on the Spider web icon to initialize Firebase for Web Apps.
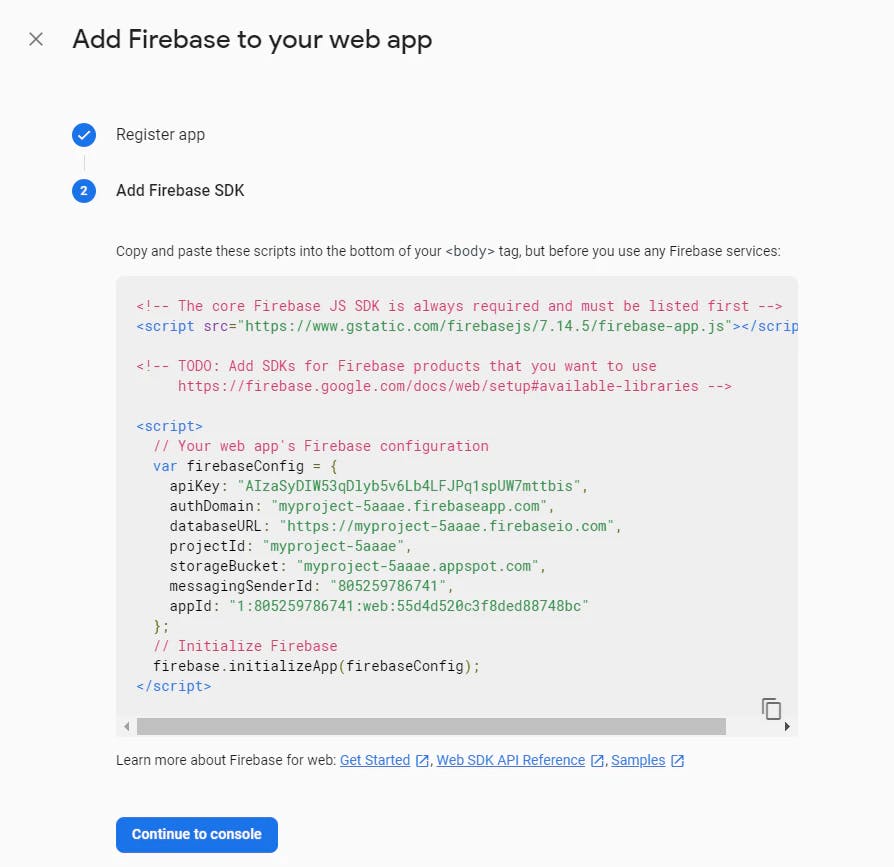
Follow the steps by Firebase and you'll reach a page that shows your config variables (meet image below). This is important so copy and salvage it somewhere. We will use it soon.
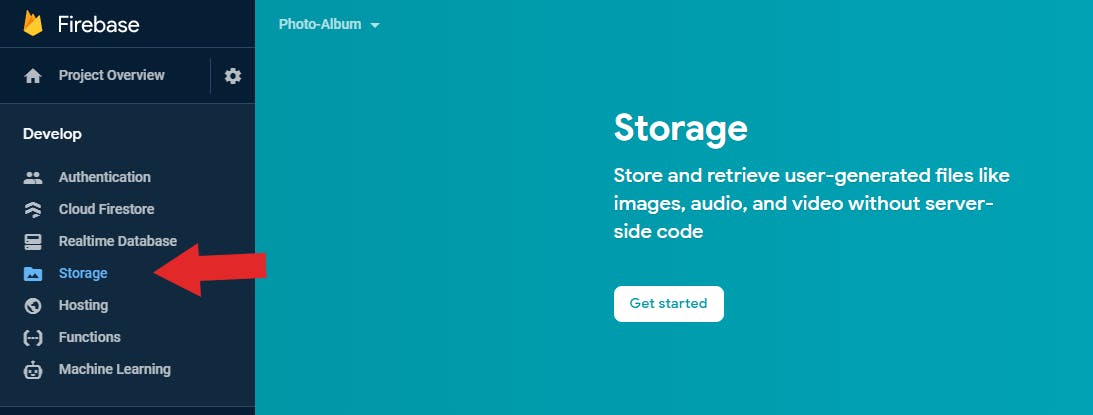
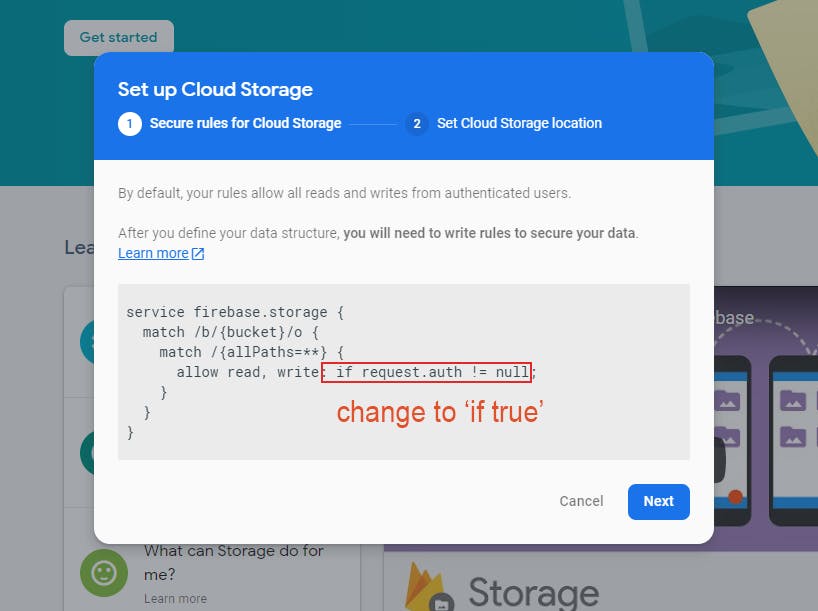
Adjacent, head over to the Storage tab and click on the 'Get Started' push.
Yous'll see a pop-upwardly window that asks if yous are okay with some settings. Replace the request.auth !=cipher to true. This ensures we are allowed to upload files to Firebase without needing hallmark for the simplicity of this tutorial.
Click 'Adjacent' to proceed.
And there you go! Firebase Deject Storage is now enabled. Let'southward integrate it into our app.
Stride 2: Create a React App
For this example, I'm using a react projection template. You tin utilise whatever front-finish framework y'all like.
To create a React projection, merely run:
npx create-react-app <app-proper noun> In one case your project is created, run:
npm install firebase This is a package that contains the necessary tools and infrastructure we need to ready Firebase in our app.
Pace 3: config.js
Create a file called config.js to store our Firebase config variables that nosotros copied earlier.
Our config.js will expect like:
import firebase from "firebase/app"; import "firebase/storage"; const app = firebase.initializeApp({ apiKey: process.env.REACT_APP_API_KEY, authDomain: process.env.REACT_APP_AUTH_DOMAIN, databaseURL: process.env.REACT_APP_DATABASE_URL, projectId: process.env.REACT_APP_PROJECT_ID, storageBucket: process.env.REACT_APP_STORAGE_BUCKET, messagingSenderId: process.env.REACT_APP_MESSAGING_SENDER_ID, }); // Get a reference to the storage service, export information technology for apply export const storage = firebase.storage(); export default app; Annotation that I'm storing the actual config values in my .env file and accessing them every bit process.env.VARIABLE_NAME.
If you are new with environment variables, I found this nice commodity explaining how to employ it.
Step 4: Uploading Files to Storage
In App.js, we can import our storage reference that nosotros exported from our config.js file.
import {storage} from "./config"; In order to upload files, we need to accept an input field for the user. We can create an input element like so:
<input blazon="file" have="image/x-png,image/jpeg" /> By specifying the type to file, the input field will be a file picker.
For this example, we only accept files that are .png or .jpeg. We can specify this requirement in the accept attribute.
Now permit's add a button that volition upload our paradigm to Firebase when clicked.
<button>Upload to Firebase</push button> At this point, the UI should look something uncomplicated similar:

1. Create Prototype state
To track whether our user has supplied a file in the input, we should have an image state. First, import the useState claw.
import React, { useState } from "react"; And initialize the land to zip:
const [image, setImage] = useState(null); two. onImageChange
Adjacent, allow's create an onImageChange function which volition update the image country every time the user supplied a new file to the input field.
const onImageChange = (eastward) => { const reader = new FileReader(); allow file = due east.target.files[0]; // get the supplied file // if there is a file, set image to that file if (file) { reader.onload = () => { if (reader.readyState === ii) { console.log(file); setImage(file); } }; reader.readAsDataURL(east.target.files[0]); // if at that place is no file, set image dorsum to null } else { setImage(null); } }; Then, we will pass this function into the onChange handler of our input element.
<input type="file" accept="image/x-png,paradigm/jpeg" onChange={(east) => {onImageChange(e); }}/> iii. uploadToFirebase
At present let'due south create an uploadToFirebase office for our button and so that the image will exist uploaded to Firebase when the user clicks the button.
This is how we can implement the function:
- Bank check if the
prototypecountry is aught. If it is, inquire the user to supply a file beginning. - If
imageis a file, we'll create a root reference to our storage. - Then we create a child reference to store our file. We tin name that reference by the image'south
nameproperty. - Finally, employ
put(paradigm)to store our file in the reference. - Then have a callback office to let the user know that the file has been uploaded to Firebase successfully.
Hither's the implementation in code:
const uploadToFirebase = () => { //ane. if (image) { //2. const storageRef = storage.ref(); //three. const imageRef = storageRef.child(paradigm.name); //iv. imageRef.put(image) //5. .then(() => { alert("Image uploaded successfully to Firebase."); }); } else { alert("Please upload an image starting time."); } }; That should do information technology!
Let's check if it works.
Yay it does! The uploaded image is in Firebase Storage.
Determination
With Firebase Cloud Storage, there are many things you can do to handle, organize and store user'south data and files. Stay tuned for the next commodity on how to retrieve, display and delete files from Firebase Storage.
You tin notice the next office here.
Thanks for reading and I hope it was helpful in any way. Feel free to enquire any questions in the comments below and refer to the Firebase documentation to read more most it yourself. Take care and cheers!
Source: https://lo-victoria.com/introduction-to-firebase-storage-uploading-files
0 Response to "How to Upload a File to Firebase"
Postar um comentário